What Is Importance Of Electronic Leak Detection

Water Leak Detection Services

Leaking pipes can cause a great amount of water damage to your home, including rotting walls, flooring, furniture, and other items the water is in consistent contact with. The moisture can eventually lead to pesky mold growth. There are a number of things that can cause a water leak, but some are more common than others. The trouble is, you can’t always tell where a leak is occurring

Emergency Water Leak Repair Service

In and of themselves, leaks aren’t a huge issue. But if you don’t spot the leak right away—if it’s hidden somewhere that you wouldn’t normally be able to check—it can cause a great deal of damage. Drywall, furnishings and even wiring and electrical components can be severely damaged by dripping water over time. The faster you can put an end to such leaks the better.

Water Leak Detection

shut off all of the water taps both inside and outside of your home, and then record the meter. Come back a couple of hours later to see whether the meter has changed. If your water usage has increased at all from your first recording, there’s a good chance you have a leak that needs to be repaired by a plumber.

Trust a Professional for Water Leak Repair

professionals. Plumbers have the right experience and proper tools to do the job. More importantly, they are licensed and bonded, which means you won’t be stuck in the event the unexpected happens and can depend on someone who repairs leaks for a living to do the job the right way.

Professional Water Leak Detection Service

use special video camera technology and similar advanced methods to spot the placement of the leak, which eliminates fishing expeditions and ensures that the repairs can begin without unnecessary damage to your home.

Water Leak Detection

If something is leaking, follow the mess and you’ll find it – right? Unfortunately, that statement isn’t always true – and it’s why you need the kind of expert leak detection

A leak can really drive you nuts because, while not necessarily an absolute emergency, deep down you just know it’s causing damage and racking up huge bills.

Water Leaks and Burst Pipes can be big trouble. But it’s not always obvious where the leak is coming from. However, it’s all a lot easier with the best water leak detection

Thermal Imaging

You’ve seen this state of the art technology used by the police, the military and when people are looking for ghosts or even Bigfoot! But it’s when thermal/infrared inspections are detecting hidden issues in your plumbing system that they really do their best work.

How’s that? It’s the most advanced plumbing leak detection technology available for finding leaks inside and outside of the building. With this sort of advanced plumbing leak detection technology and expertise,

HELPING THE POOL PROFESSIONAL SOLVE LEAK PROBLEMS

GATHER INFORMATION

Before investing time in extensive testing procedures it is important to gather information about the pool’s actual water loss. When gathering information, you should first determine if there really is a leak. A “Bucket Test” can be performed to determine how much of the observed water loss is due to evaporation and how much is due to a leak. Other tests such as the “Pump On/Pump Off Test” will provide a useful base of information that will be helpful as you continue the leak detection process. If you want to be more efficient when determining a location of the leak, The Leakalyzer Water Loss Sensor assists by enabling the collection of this information in minutes rather than days.

PRESSURE TEST PLUMBING

Regardless of the suspected location of the problem, a pressure test of all plumbing lines should be done to confirm whether the leak is in the plumbing or the structure (shell) of the pool. Using the process of elimination, pressure testing allows you to conclusively isolate which part of the pool is leaking so later location procedures can be efficiently targeted.

Pressure Testing Kits that include a Pressure Tester and Open Stem Plugs as well as an assortment of Closed Plugs all packed in a convenient tote. These kits provide what you will need to quickly and confidently pressure test most residential swimming pools. Depending on where you are located and the type of pools you frequently work on you will likely customize your kit with additional plug sizes and styles based on your experience

PINPOINT PLUMBING LEAKS

If a leaking section of plumbing is identified, add a constant flow of air from a regulated air source into the line. As this air escapes into water saturated soil it will make a distinctive bubbling sound that can be pinpointed through the pool deck or soil with an electronic listening device. In most cases this process will enable the location of hidden underground leaks so that repairs can be made with minimal excavation. In situations where this noise cannot be created a Gas Sniffer can be used to locate the presence of a tracer gas escaping from the leak.

CHECK STRUCTURAL LEAK LOCATION

Using a Dye Tester, put a small amount of dye near suspected leak areas in the structure of the pool to see if the dye is pulled out of the pool. Check skimmers, return fittings, lights, cracks, main drains, and hydrostatic valves. Diving Equipment may be necessary for checking for leaks at the bottom of the pool. Hydrophones (an underwater microphone that attaches to an XLT17 or XLT30 Listening Device) can be used to check areas especially in concrete pools that can’t be reached without diving.

LEAK DETECTION

An undetected leak can cause significant water damage to your home and allow mold and mildew to grow. When a leak is beneath the slab foundation or behind a wall, locating the exact damage of the pipe can be a challenge.

Detecting Hidden Water Leaks

Accurate leak detection is essential for prompt repairs and preventing damage to your home. We have the most advanced equipment to detect all types of leaks, including slab leaks. When a pipe leaks under the slab, it can be difficult to identify the source of the problem. Fortunately, there are some signs that can help tell you when you have a slab leak.

You may have a slab leak if you notice:

An excessive water bill

Hot or cold spots on the floor

A damp or soggy spot on the carpet or flooring

An odor of mildew or mold

Because slab leaks occur under the concrete slab and other leaks happen behind walls, pinpointing the source without damaging your flooring or walls has been a challenge. The development of electronic leak detection equipment enables our technicians to find the exact location of the pipe damage without causing any damage to your home.

Gas Leak Detection & Repair

Although there are many signs of a gas leak such as a rotten egg smell, a hissing sound near the connections, or dying vegetation around the gas line, nothing beats the expertise of a professional gas plumber

Leak Detection Checklist: The User Guide

That said, a little depth, a little clarification, a little explanation can only enrich the resource. It’s like doing your taxes: when you’ve done it often enough, all you really need is the form. But it’s always good to have the instruction booklet to reference and make sure you’re fully understanding the boxes you’re filling in.

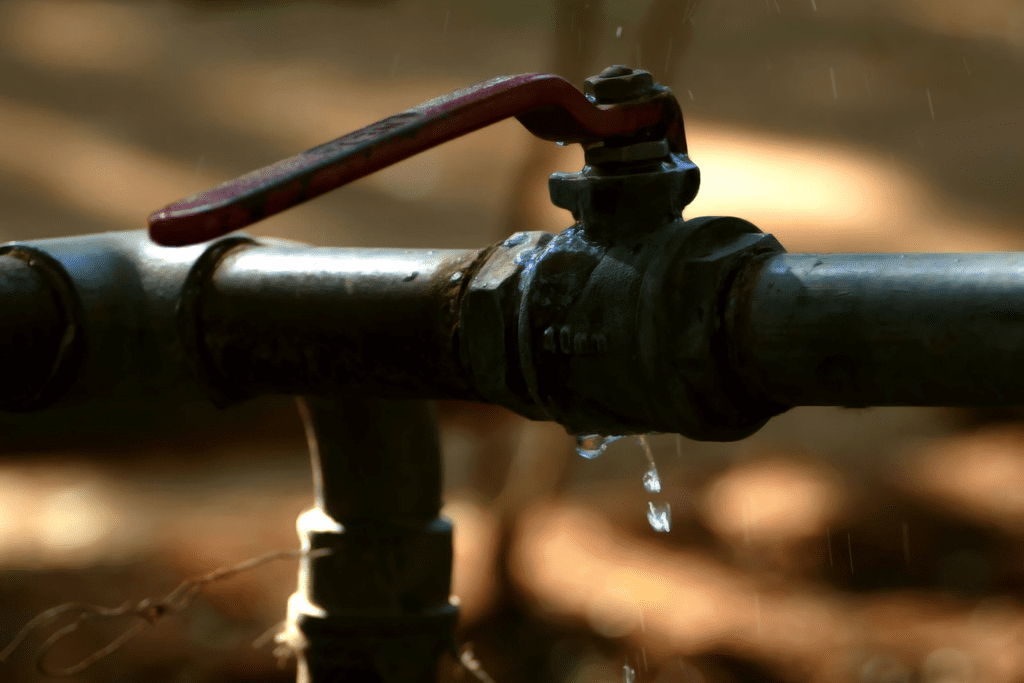
Faulty connections, fittings, and valves

No facility can be served by one long, single pipe, and anywhere two (or more) pipes meet, leaks are possible. Time and wear can deteriorate and break the seals and, left unchecked, small leaks can become big leaks and cause significant damage

Failing or freezing pipes

Frozen fluids expand with enough force to crack plastic, copper, or even steel pipes. When that frozen water thaws, the resulting leaks can cause damage not only to the pipes and fittings but also to the walls around them. (P.S. This isn’t just external pipes; if your heating system goes down, any pipe runs the risk of freezing.)

At-risk water supply or return lines

There are a number of risks that your pipes may encounter: freezing, water hammer, age, physical damage. Think about the environment that surrounds your pipes and what dangers exist. For example, be aware of the pipes that feed into overhead sprinklers. Those sprinklers are prone to damage and are a weak spot in your water system.

Uncapped sprinkler lines

Like we said, these things are dangerous. Though it’s infrequent, when repairs are made to overhead fire suppression systems, sprinkler heads can be left uncapped. The result is an open water line that can spew a tremendous volume of water very quickly. Know where your sprinklers are and be aware of any maintenance they undergo.

UNCLOGGING TOILET

How to Unclog a Toilet

If your toilet is clogged, don’t flush it repeatedly. The toilet bowl can’t hold much more than a tank full, so it’s likely to overflow it you flush it more than once. Rather, try unclogging the toilet by plunging, lubricating or snaking. If the toilet is clogged from too much toilet paper, simply letting the full bowl sit for a few hours will sometimes do the trick. The paper will break down on its own and then you can flush it away .

If the clog source is bigger or more serious, the first thing you should try is plunging the toilet with a funnel-cup plunger.

Cover the drain with the plunger.

Quickly pull the plunger off the drain opening. Repeat this several times, until the clog is pulled out.

Be careful to plunge in a way that will pull out the clog rather than pushing it deeper down.

If the water is draining too slowly, you can try lubricating the drain.

Mix a gallon (3.8 liters) of hot (not boiling) water with a few tablespoons of lubricant, such as dish soap or cooking oil.

Pour mixture into the toilet.

Let it sit for a few hours.

Try flushing

If you need to “snake” out the toilet, use a closet auger; not a snake. A snake will scratch up your toilet bowl’s porcelain, while an auger has a soft, flexible sleeve that will prevent scratching

Feed the tip of the auger gently into the opening.

Crank clockwise while pushing down, until you feel resistance.

If the auger gets stuck, crank it counter-clockwise while pulling back. Once it’s freed, you can resume cranking clockwise until the auger is as far down as it can go. Its sleeve should be at the bottom of the bowl.

Continue cranking as you pull the handle up.

If the auger jams, push gently and then pull again.

Remove the auger when the blockage is cleared.

Use the plunger on the drain just in case there’s still some leftover debris.

Flush to check that the water is draining freely.

If you find yourself without a plunger, check out these two methods for getting it unclogged.

How to unclog your toilet without a plunger

Plunger

We’ve all been there. The toilet is clogged and you can’t find your trusty (and probably crusty) plunger. No sweat! As long as you don’t make this mistake which will make your clogged toilet so much worse, we can get you through this! These hacks will help you unclog a toilet without a plunger, whether you lost it, refuse to touch it, or are looking to live a plunger free life.

Start with dish soap

Soap

As soon as the toilet clogs, head to the kitchen and fetch some dish soap; the slippery soap should help lubricate the clogged pipe and allow the lodged debris to slide down more easily. Pour about a half-cup into the toilet. If you haven’t got any dish soap on hand, chop bar soap into small chunks and drop the pieces into the toilet. These are the 12 things you should never flush down the toilet.

Add hot water

Add hot water

If dish soap alone doesn’t do the trick, adding water might move things along. Fill a bucket with hot bath water (boiling water could cause a porcelain toilet to crack), and pour the water into the toilet from waist level. The force of the water could dislodge whatever is causing the clog.

DIY a drain snake using a wire hanger

Wire Hanger

Disclaimer: right before you googled “how to unclog a toilet without a plunger,” you probably should have determined what is causing this blockage. A more severe blockage could require manually moving the item. To do this, unravel a wire coat hanger until it’s straight. Push one end of the wire into the clogged area. Prod the debris until it becomes free and flows down the drain.

Try this mixture

Mix alternative

As an alternative to using dish soap, try this all-natural solution: Pour 1 cup baking soda and 2 cups vinegar into the toilet. Allow it to fizz for a half hour. If the clog doesn’t dissipate, try the hot water trick to unclog a toilet without a plunger. And try not to be too grossed out—here are 9 everyday items dirtier than a toilet seat.

When to Call the Plumber


There are times when your own efforts just aren’t enough. How do you know when it’s time to call in the professionals to battle your clog? If you see water backing up in the sinks or showers whenever you flush, it’s time to bring in a plumber. Water backing up in odd locations when you flush means you have a clogged main line. A plunger and auger won’t get the job done.

How to Avoid Clogged Toilets
First, teach children that the toilet is not a Jacuzzi or water ride for their GI Joes.

It’s important to ensure the jets around the toilet bowl’s edge are nice and clean. Stopped up jets will prevent the toilet from flushing at full power which in turn prevents you from clearing out the toilet and its contents. Weekly toilet cleaning with a brush will prevent build-up. If you haven’t cleaned the toilet in a while, you’ll probably have mega buildup. Using an Allen wrench or screwdriver to clear out the junk.

Finally, take it easy on the paper. You don’t need an entire roll to wipe your bum.

How to Unclog a Toilet with Baking Soda

Troublesome toilet clogs are frustrating to deal with, especially when you need use of the toilet in your home! Luckily, you will be able to fix many toilet clogs cheaply with the help of baking soda and a plunger, before you resort to calling a plumber. It’s also important to follow some basic guidelines to prevent future clogs after you get your clogged toilet running smoothly again.

STEP 1
Using Baking Soda and Vinegar


Pour 1 cup (240 mL) of baking soda into the clogged toilet. Measure out the baking soda with a measuring cup or scoop and dump it into the toilet bowl. Let it sink to the bottom of the sitting water and settle.[1]
Baking soda has lots of household cleaning uses, so it’s a good item to keep on hand from your local supermarket!

STEP 2


Add 1 gallon (3.8 L) of boiling water and see if the toilet unclogs. Boil the water in a kettle and carefully pour it into the toilet bowl. Don’t do this if the water level is already high in the toilet bowl.[2]
The heat and pressure of the water can help unclog the toilet faster. If you hear a suction sound and see the water draining out, then gravity and the hot water were enough to unclog the toilet. Give it a flush to see if it works as it should.[3]

STEP 3

Pour 2 cups (470 mL) of white vinegar into the toilet if it is still clogged. Pour very carefully, and pay close attention to the reaction between the vinegar and baking soda so that it doesn’t fizz over the toilet bowl. Stop pouring and wait for the fizzing to subside if it gets too high, then continue pouring until all the vinegar is in the toilet bowl.[4]
The “volcanic” reaction between the baking soda and vinegar is what unclogs the toilet, but be very careful not to let it erupt all over your bathroom floor!


STEP 4


Let the mixture sit for at least 2 hours, or overnight until the water drains. Check on the toilet after 2 hours have passed, and try flushing it if the sitting water has drained. If it looks like it is still clogged, let the mixture sit overnight before you flush it.[5]
Repeat this process if the toilet does not unclog the first time.

All Natural DIY Recipe – Safe and Effective Toilet Declogger

It worked! This all-natural DIY recipe really worked.  Not just once, but it did the trick two different times on my completely clogged toilet. (Yes, we have really crappy toilets–no pun intended.)

Let me tell you, I was one happy homeowner upon discovering this simple, cheap, and safe DIY solution!  That’s because a plumber visit costs at least $150 and Drano and Liquid Plumbr scare the snot out of me.  Seriously, listen to the warnings from the Liquid Plumbr company itself about the dangers of its product:

“…Never use Liquid-Plumr with other drain-cleaning products. The bleach contained in Liquid-Plumr can react with other chemicals, such as ammonia, to create toxic vapors. Also, use of a plunger can be dangerous, as the product can damage skin, eyes and mucus membranes on contact…Handling lye in any form can cause chemical burns and skin damage and ingesting it can result in permanent injury or death.

Do I want a chemical compound like that in my house, near my babies, in our water system?  No spanks.

The best part, besides the fact that this all-natural DIY actually works, is that it only requires two CHEAP ingredients out of my kitchen cabinets. Check out this DIY recipe my 3-year-old could make and administer to said clogged toilet…

All-Natural DIY Recipe

1) Into a clogged toilet filled with standing water, dump 1 cup of baking soda.  Let it sink to the bottom.

2) If the toilet doesn’t have much water, add 1 gallon of boiling water to really get things moving.

3) Next, add 2 cups of vinegar slowly, so it won’t fizz over onto your floor.  Ickkk!

4) Let it sit for a couple of hours and see if the water has drained.  If it has not, let it sit overnight and then plunge, if needed, before flushing.

My Test Results of the DIY

Tonight, I tossed in the DIY and let it sit for a couple of hours.  When I returned, the standing water was gone and the toilet flushed right away!  However, the first time I used this all-natural DIY recipe, I had to let the concoction sit overnight in the toilet.  After a good plunging, it began to work a little better.  I used the DIY one more time, and after a few hours, the toilet was completely unclogged.

From my research, it sounds like this is safe and effective to use in kitchen and bathroom sinks and drains, as well.  One tip I read was to hold something over the opening of the drain so the fizz goes down it instead of back up and out.  Obviously, I didn’t do this for my toilet!

May the toilet unclogging force be with you next time you give this DIY a try!

How to Find a Tankless Hot Water Heater That’s Best For You

Do your homework and you’ll see that the energy efficiency factor makes finding the best tankless hot water heater worth the effort. Energy efficiency is just one way to look at this. Important points given here will guide you in choosing the best tankless hot water heater to fit your needs.

The measure of efficiency

The DOE uses EnergyStar ratings to help consumers find the best tankless hot water heater, or other appliance that will save them money. Electric tankless hot water heaters are rated .99 energy efficient, while tankless gas heaters are rated at .80. The difference comes from the loss of heat in the combustion process of gas burners. Tank water heaters have an even lower efficiency rating.

If the cost of electricity is competitive in your area, factor in the long-term cost when making your decision. Even so, gas may still be your best choice for a tankless hot water heater. Only gas can produce enough hot water for a large home.

Here are some numbers to give you a rough idea: Electric tankless models produce a flow of only 2-5 gallons per minute of hot water, while gas models can produce 9-13 gallons of hot water per minute. Using multiple units is a way to custom fit tankless models to fit your needs and reduce wasted energy.

For your reference, a shower, with a water saver nozzle uses 1-¼ to 1-½ gallons per minute. A tub or clothes washer uses about 2 to 2-½ gallons per minute.

Energy prices

It was once understood that natural gas was the better value, but times change. Don’t assume, compare utility rates for your area. A lot has changed in recent years. The cheap price of gas that once made a 65 percent efficiency rating for home heating needs a bargain has changed.

Now with competitive electric power in some areas a 99 percent efficient tankless electric could really be your best tankless hot water heater.

Tankless Hot Water Heaters – What to Look For

Electric tankless hot water heaters come in very useful sizes – from something that looks like a loaf of bread to some the size of a PC. All have the capability of providing instant hot water on demand.

Installing a tankless hot water heater while a new home is under construction makes good sense, especially for gas units that require more to make them operational. Some require a larger gas line as well as category III venting materials. Some have exhaust and fresh air as a combined system.

Tankless hot water heaters are also a good choice for most retro projects, and should be considered a good choice for second homes and weekend retreats where the percentage of standing hot water is wasted.

Tankless hot water heater models offer great savings in in a variety of ways. For instance, the compact size means less natural resources are needed for manufacturing. Parts are replaceable, opening the possibility that the tankless hot water heater you buy today may be the last one you will ever need. And probably one that you can repair yourself, with mail order parts, if you choose.

Here are a few other advantages:

  • No wasted energy
  • Longer life
  • Smaller models for single source use
  • Less corrosion and deposits
  • A way to avoid peak energy charges
  • Less is more
  • Even shipping translates into an advantage. Because of their size and weight, tankless units are not as affected by factors such as rising transportation costs. An electric whole house tankless hot water heater can be shipped to your home, and be operational the same day.

Tankless Hot Water Heaters – The Advantages

Whether you choose gas or electric, there are many ways to get savings out of a tankless hot water heater. For instance, less natural resources go into the manufacturing of these compact size heaters. Another plus, parts are replaceable, leading to the possibility that the tankless hot water heaters you buy today may last well beyond its projected life. And perhaps one that you can repair yourself with on-call parts.

  • Here are a few advantages to remember:
  • No wasted energy.
  • Larger models for bigger homes.
  • Smaller models for single source use.
  • Less corrosion and deposits for longer life.

It is estimated that 5-10 million hot water tanks go to the landfill each year. This is where tankless hot water heaters can have a deep impact. Tankless hot water heaters are a completely different breed. Because there is no standing water there is less corrosion and oxidation. Lifespan is predicted to be 20 years or more. Heaters are designed with easy to replace parts and when they do go to the landfill it’s an easy salvage of metals that will find there way back into the manufacturing system, a payback that spells a win for the environment.

Compared to tank water heaters there are savings that come from efficiency, size, service and convenience.

Efficiency – Here in descending order are the most efficient:

  • Electric tankless
  • Electric tank
  • Natural gas tankless
  • Natural gas tank
  • Propane tank

Size – Both gas and electric tankless hot water heaters are wall mounted. The largest being about the size of a suitcase – size and weight make transportation and delivery costs less.

Service – Warranty period is, for most models, 10 years. Parts are easy to access and replace.

Convenience – On demand hot water says it all.